You want to start a bullet journal but you’re not sure where to start?
This is a guide to the basics of Bullet Journaling, including everything you need to know to get started today.
What Is A Bullet Journal
You can find just about every planner and journal you could ever dream up, but none of them are customised for your exact needs.
Enter the bullet journal.
The Bullet Journal, or BuJo is an analog system created by New York based designer, Ryder Carroll.
It’s an organisational system in a notebook that keeps track of everything you could ever want. It’s used for everyday planning, a task manager, journal, idea tracker, and anything else!
The Psychology of Bullet Journaling
If you’re the kind of person who keeps all your information on your smart phone, you may be wondering why you would benefit from bullet journaling.
Analog organisational methods like bullet journaling allow you to externalise your thoughts to free up mental space for clearer thinking and better productivity.
They also allow for better retention. Writing by hand engages your brain better than typing on a computer or plugging away on a smart phone, which helps commit information to memory.
Bullet journaling also has benefits over regular paper planners. It’s a task list, journal, and life record all in one. You can track your mood, accomplishments, eating habits, or anything else you want.
Taking time to reflect on what’s going well in your life and what you need to work on allows you to visualise your future and be more productive.
How To Get Started
It can be a little bit intimidating when you see the professional bullet journals with their $40 pens and intricate designs lining the pages.
The good news is that you can start a bullet journal in just a couple minutes with only a few materials.
Step 1: Change Your Mindset
Why are you starting a bullet journal? Most people who start bullet journaling do it because they’re able to organise important pieces of their life in a flexible way that lets them plan and visualise however they want.
You will make mistakes, your lines won’t always be perfect, and you’ll probably change your method a few times before you find what works best for your lifestyle.
Let go of perfection and embrace the mess. It’ll make the whole process a lot more enjoyable.
Step 2: Gather tools
All you really need to start is a notebook and a writing utensil. A notebook with blank or dotted pages offers the most flexibility, while lined will allow for more structure.
Check out our great range if you need a lovely new notebook.
Once you’re ready to invest in quality materials, you’ll want to look for a notebook with high grade paper that is thick enough not to have any bleed-through. A pen that glides across the paper will also make your life much easier.
If you’re not ready to take the plunge and invest in materials, grab a regular lined notebook and a pen and do a quick set-up so you can see how everything works.
Step 3: Create an Index
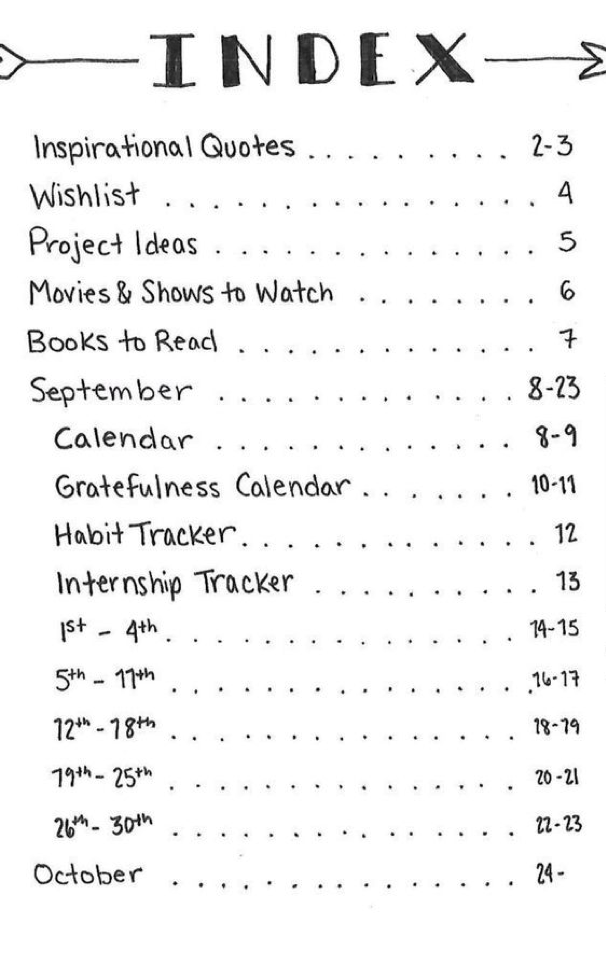
Open to the first set of blank pages. This is the index, the backbone of the bullet journal.
You will need to number your pages or find a notebook with numbered pages for the index to work.
The index is how you organise your collections in the bullet journal, and how you find them later. Some notebooks already have indexes and page numbers built in, but others you will need to do yourself.
Step 4: Create a Key
Bullets and signifiers by Violette Factory (violettefactory.com)
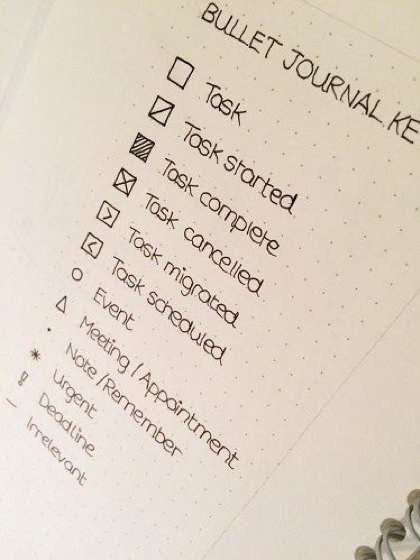
After your index, you’ll want a key to keep track of the symbols you use to give meaning to your items.
Many people in the bullet journal community also refer to this as rapid-logging. This process is essentially how bullet journaling got its name.
There are two parts to rapid-logging: bullets and signifiers.
Bullets categorise your items by type. For example, you can use different symbols for tasks, events, or notes.
You can break it down even further and have different symbols for completed tasks or migrated tasks.
For example:
- X Completed – Once a task is done you can mark it with an X
- > Migrated – If you didn’t finish a task, you can migrate it to another spot
Signifiers add additional meaning to your items. Not every item needs a signifier, but if you’d like a bullet to stand out you can add an extra symbol.
For example:
- * Priority
- $ Bill
- ! Reminder
You can use any symbol that has meaning for you. If it gets too complicated, just forget about the signifiers until you find a need for them.
Step 5: Create Collections
Each entry in your bullet journal is a collection. Collections are simply groups of related ideas. For example, a meal plan, grocery list, brainstorm page, budget tracker, or workout log are all collections.
They can also be in any shape or form: lists, sketches, doodles, mind maps, charts, etc. Whether you’re a visual or analytical thinker, a Type A or Type B personality, the beauty of a bullet journal is that it works for everyone!
You can create a new collection anytime you want to keep track of related ideas.
There are three main collections that most bullet journals include. These core collections are called Logs.
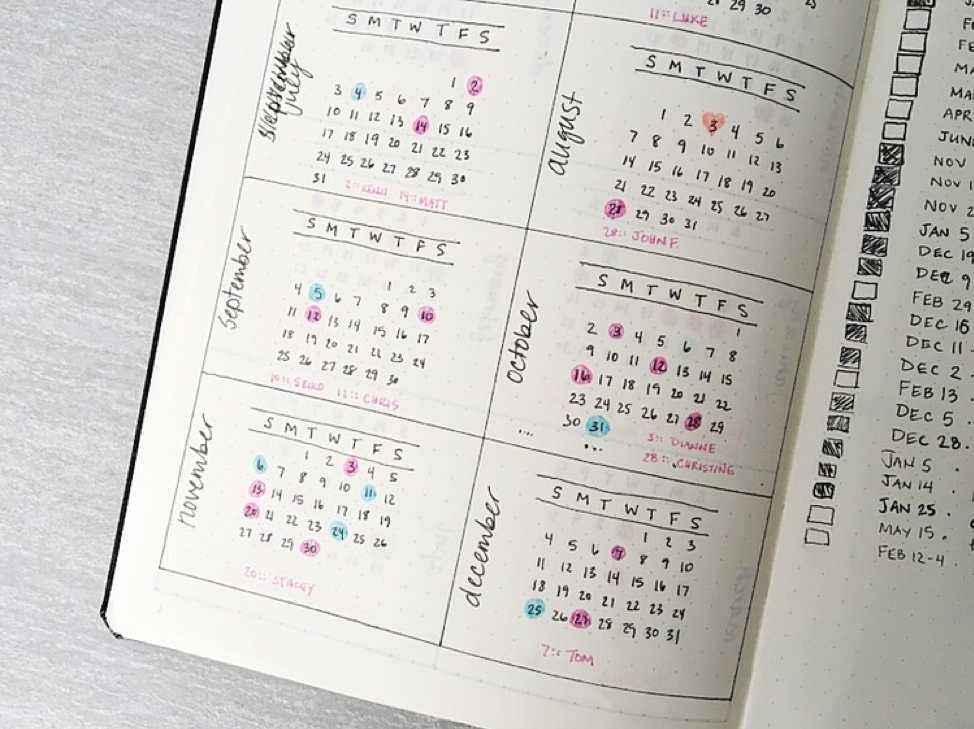
- The Future Log helps you keep track of events or tasks that you have coming up. You can do this in a list form, a grid with the names of the months, or just keep a blank page for events and tasks that don’t have a specific date tied to them, but that you want to do at some point.
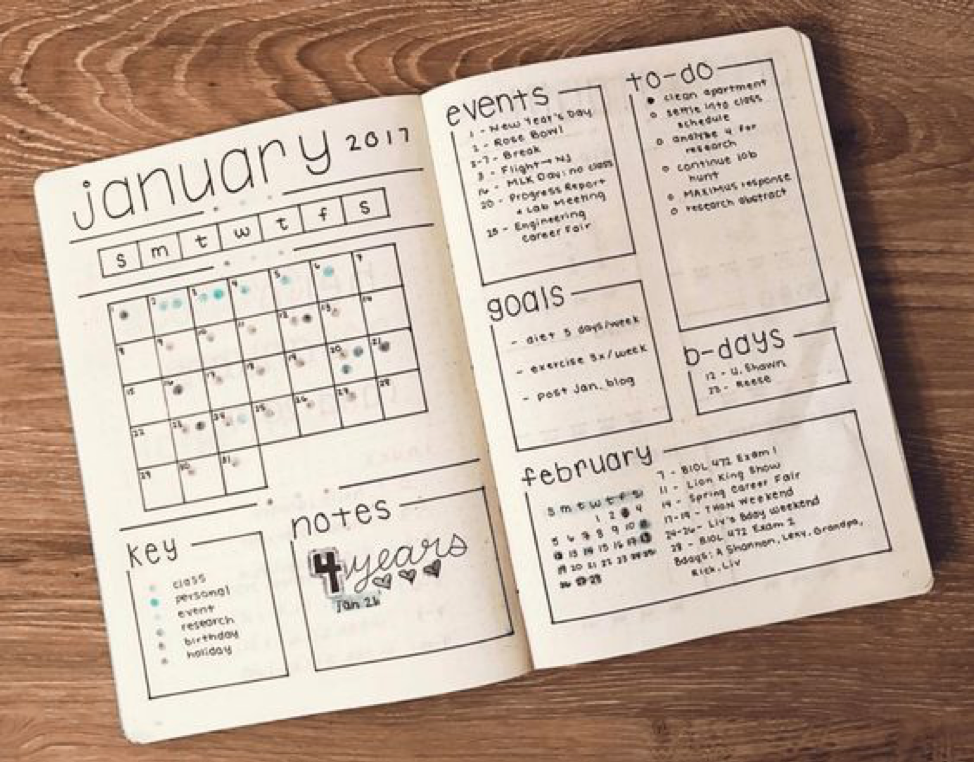
- The Monthly Log includes your calendar for the month and goals, tasks, and events coming up. The great thing about the bullet journal is that you can start it any time of the year. Create a list of the days of the month or create a grid calendar on one page of your spread. On the next page, many people like to keep a monthly task list.
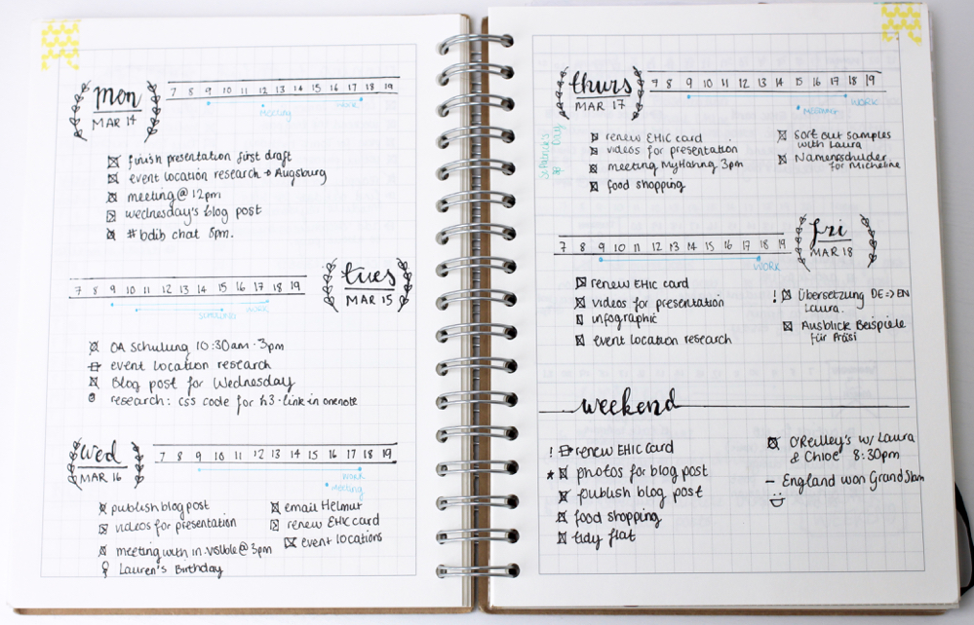
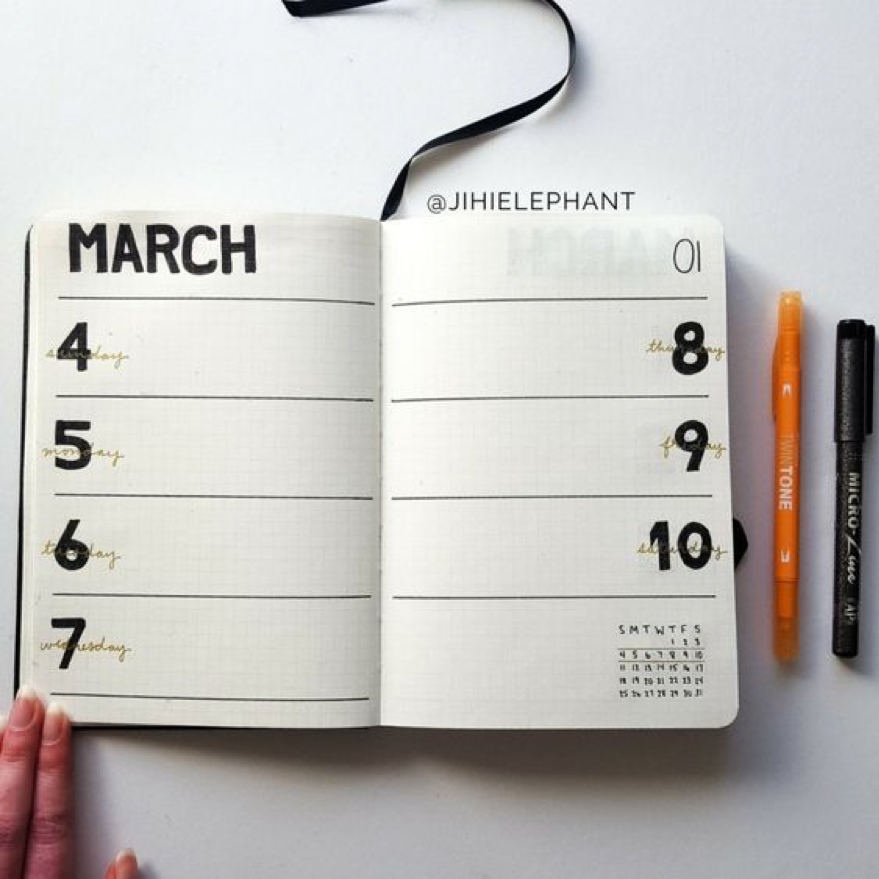
- The Daily Log includes detailed entries of meetings, tasks, and reminders.
Step 6: Find Your Workflow
The Bullet Journal only works if you remember to make time to update it. There are a few basic ways to put all the pieces together to create an efficient workflow.
- Remember to add all new collections to the index. Writing something down won’t do you any good if you can’t find it later on.
- Migrate your items from your previous method of organisation to your bullet journal right away. If you currently keep a planner, a calendar on your phone, or just a note on the back of your hand you should migrate it to your bullet journal.
- Don’t create a new collection for every thought that pops into your head. You may find yourself overwhelmed if you have too many pages to flip through to find what you’re looking for. Keep your collections simple and useful.
- Cross off items on your daily and monthly logs as you complete them. You won’t be as confused when looking back on what still needs to be done. Take time to reflect on what’s working and not working and make updates as needed. Look on Pinterest and Instagram regularly to get ideas.
Step 7: Add Embellishments
Yes, the Bullet Journal is about organisation and efficiency, but it’s also about having fun and being creative!
There’s no need to border each page with patterned Washi tape and have 20 different fonts with different coloured pens for each collection. But it is fun to flip through a colourful bullet journal with some designs and decorations.
The only thing you need is a black pen and your imagination but if you’re feeling a little more ambitious you can do things like fun fonts, doodles, themed collections, Washi tape, etc.
Just have fun with it and embrace it if it becomes a little bit messy!
Let’s See Some Examples of Bullet Journals in Action
Here’s some inspiration. Remember, every bullet journal looks different for everyone! It’s important to find what works for you and makes you more productive and efficient.
The only way you’re doing it wrong is if it’s not making your life easier and more organised.
